AN ECLECTIC, LOCALLY SOURCED MENU FROM OUR WINTER FARMERS’ MARKETS
Cooking with local ingredients can be a challenge in winter, but not an impossibility. Head to one of the winter farmers’ markets in the area and you will find meat, root vegetables, and cold-season greens, all grown on nearby farms. And though foods grown by small-scale farmers can be pricier than their factory-farmed equivalents, they are fresher, taste better, and help support open spaces and our regional economy.
That said, keep a few things in mind when cooking with ingredients from the winter farmers’ market. For starters, it’s great to know that the meat you purchase from a nearby farm was humanely raised, but that also means that these animals spent a lot of time walking around grazing and foraging. So, the same muscles free-range animals develop remain soft and mushy in factory-farmed animals. As a savvy chef, you must remember that factory-farmed animals cook up easy to chew, while free-range meat cooked quickly will be tough. Cooking low and slow is key when preparing locally raised, grass-fed, free-range meat, whether it’s beef, lamb, pork, or poultry.
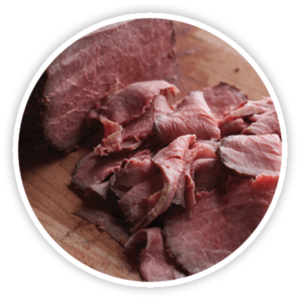
Slow Roasted Garlic Beef is a wonderful recipe I use to cook cuts of beef from Miles Smith Farm in Loudon, run by my neighbor Carol Soule, who has done so much to promote the local food economy. But it works just as well with a cheaper cut from the supermarket if that’s what’s in your budget.
Most of these recipes rely on root vegetables, the staple of the winter larder. In the old days, New Englanders harvested potatoes, carrots, beets, parsnips—and anything else that grows underground—in the fall and then popped them into cool storage below the frost line in root cellars. Today’s farmers do the same on a grand scale. Thus, root vegetables and a few squash varieties are abundant at local winter farmers’ markets and can be used interchangeably in the following recipes.
Other local ingredients that are easily found—or grown in your own cold-frame—in winter include cold-tolerant greens such as spinach, Mâche, beet greens, and certain lettuces and herbs. These recipes are based on local ingredients available in winter. Yes, you will have to hit the grocery store for basics such as flour, olive oil, sugar, salt, and spices. But the building blocks of the recipes can come from your own garden or the winter farmers’ market up the road.
Recipes:

Slow Roasted Garlic Beef
3½–4 lb inexpensive beef roast, such as a round or chuck
1 head garlic, broken into cloves and peeled
1–2 Tbsp kosher salt or coarse sea salt
2 Tbsp olive oil or unsalted butter
1. If possible, the day before cooking, sprinkle salt generously all over the beef, place it on a few layers of paper towels on a plate, cover it lightly with more paper towels, and place it in the refrigerator. This dry-brining process helps to keep the meat moist when it cooks.
2. When ready to cook the meat, preheat the oven to 250º. With a mortar and pestle or in a blender, puree the garlic with a few teaspoons of salt and 1 tablespoon of the oil. Set aside.
3. Heat a heavy skillet over medium-high heat and add the remaining oil. Brown the beef well on all sides in the skillet. When the beef is browned, place it on a clean plate and rub it all over with the garlic paste.
4. Place the beef on a rack then put the rack on a sheet tray and place in the oven. Cook the beef for about an hour, or until it registers 115º in the center. When testing the temperature, remove the beef from the oven and close the door so the oven retains its heat.
5. When the meat is 115º, return it to the oven and turn the oven off. Leave the meat in the oven until it registers 130º in the center, about a half hour longer depending on the size of the roast.
6. Remove the meat from the oven, place a tent of aluminum foil over it, and allow the meat to rest for 15 minutes before slicing as thinly as possible, across the grain. The meat may also be refrigerated and served cold.

Borscht
Serves 6–8
2 Tbsp oil, such as sunflower
2 lb very meaty beef shanks (or other meaty beef soup bones)
1 medium onion, peeled and coarsely chopped
2–3 large carrots, peeled and coarsely chopped, divided
1 qt beef, chicken, or vegetable stock, preferably homemade
1 qt water
16 oz canned tomatoes, chopped (use juice and tomatoes)
4 cups sliced red cabbage (about 1/2 lb)
2 medium beets, peeled and grated (about 3/4 lb)
4 cloves garlic, minced
2 tsp dill seed and 1 tsp fennel seed, ground together in a spice grinder
1 bay leaf
1 tsp sweet paprika
1 cup hard apple cider or 1 scant cup sweet cider with 1 Tbsp cider vinegar added
3 medium waxy potatoes, peeled and cut into ½-inch chunks
1 tsp kosher or sea salt (or to taste)
Freshly ground black pepper, to taste
Sour cream or yogurt and chopped fresh dill, for serving (optional)
1. Heat the oil in a large, heavy pot then add the beef shanks and brown well on both sides. Remove the shanks and set aside, then add the onion and half of the carrots. Brown these well, too, adjusting the heat if necessary so the bottom of the pot doesn’t blacken.
2. When the vegetables are browned around the edges, add the stock and water and stir well, scraping the bottom of the pot so the caramelized juices mix into the liquid. Return the beef shanks to the pot, bring it to a simmer, turn the heat to low, cover the pot, and allow the mixture to cook for about 1½ hours, or until the meat is falling off the bone and tender. During this time, occasionally remove the lid and scoop off any foam and excess fat that has accumulated on top of the stock and discard it.
3. When the meat is tender, remove it and the bones and set aside. Pour the stock through a strainer to remove the carrots and onion. Discard the vegetables.
4. At this point, the meat and bones can be returned to the stock and the mixture can be chilled in an ice bath and then refrigerated overnight before finishing the borscht the following day. If this is done, remove the coagulated fat from the top of the stock and discard it before continuing with the recipe. If continuing straight on with the recipe, try to remove some of the fat floating on the stock before continuing.
5. Pull or cut the shank meat into chunks. Put the stock in a large soup pot and add to it the remaining carrot, tomatoes, cabbage, beets, garlic, dill and fennel, bay leaf, paprika, and cider. Place a lid on the pot and bring the mixture to a simmer, then remove the lid and continue simmering until the beets are beginning to get tender, about a half hour. Add the potatoes, salt, and pepper and continue simmering until the potatoes are tender, about 20 minutes.
6. The soup can be served immediately, but it is even better if cooled and refrigerated overnight. Reheat if necessary, then divide between soup bowls. Garnish each with a dollop of sour cream or yogurt and a hefty sprinkling of chopped fresh dill. Serve immediately.
Winter Squash Tortillas
3 cups flour
1 cup whole-wheat flour
1 tsp salt
3 Tbsp cold butter
1/2 cup pureed winter squash
1/2 cup or more water
1. Combine the first four ingredients in the bowl of a food processor and pulse until well combined. Add the squash and pulse. Finally, add sufficient water to make a soft but not sticky ball of dough. Remove dough and knead on a counter until smooth. Divide into about 2 dozen small balls, cover with plastic wrap and rest at least 1/2 hour.
2. Roll the balls on a lightly floured surface with a rolling pin until very thin and about 8 inches across.
3. Cook on a hot griddle, a minute or two per side, just until small brown spots form.

Locally-Grown Dried Beans with Garlic, Lemon, and Olive Oil
1 cup dried locally grown dried beans such as cranberry, pinto, or any other medium-sized dried bean, cleaned and soaked in water overnight, or brought to a boil and soaked one hour
1/4 cup extra-virgin olive oil
1 medium onion, peeled and minced (about 1 cup)
1 Tbsp flour
3 Tbsp tomato paste
3 cups of water
1 tsp salt (or to taste)
5 cloves of garlic
Juice of 1 large or 2 small lemons (reserve the rind for Olives and Feta with Lemon)
Hot red pepper paste, for garnish (optional)
1. Heat the olive oil in a heavy pot and then sauté the onion over medium-low heat until it is translucent. Stir in the flour (if using) and cook, stirring for 1 or 2 minutes; do not let the mixture brown. Stir in the tomato paste and cook for an additional minute.
2. Stir in the beans and cook for 5 minutes, stirring occasionally. Stir in the water, turn the heat up to bring the liquid to a boil, and then turn the heat to low. Cover the pot and cook the beans slowly until tender. This will take anywhere from a half hour to two hours depending upon how old and dry the beans are.
3. When the beans are fairly tender, add the salt (adding the salt too early toughens the bean skins). Stir in the garlic and lemon juice, return the lid to the pot, and continue to cook for 10 or 15 minutes until the beans are very soft.
4. Taste and then add additional salt or lemon juice if desired. Drizzle with hot red pepper paste if desired. Serve immediately. The beans will keep well for one or two days in the refrigerator or may be frozen.
Root Vegetable Humus
Makes about 1½ cups
1/2 cup almonds or walnuts
3 small beets, carrots, parsnips, turnips, or other root vegetable, roasted or microwaved until tender, then peeled and grated (about 1 cup)
2 small cloves garlic, peeled and chopped
1 tsp ground cumin
1/4 cup extra-virgin olive oil
Juice of 1 small lemon (about 2 Tbsp)
1 Tbsp tahini
The leaves from several sprigs of parsley, mint, and dill, minced (about 1 tablespoon total)
Salt and pepper to taste
Place all ingredients in the bowl of a food processor and pulse until it becomes a slightly chunky puree. Taste and adjust seasonings if desired. Serve with winter squash tortillas.

Winter Greens Salad with Chickpea Yogurt Sauce
Makes about 1 cup of sauce
For the Winter Greens:
Mixed winter greens such as lettuce, spinach, tatsoi, baby kale, etc., 1 good handful per person, washed and dried
For the Sauce:
1–2 cloves garlic, chopped (or to taste)
1/2 tsp salt
Juice of one lemon (or more to taste)
1/4 cup tahini
Water, as needed
1 cup cooked chickpeas (canned is fine, but rinse them first)
1/2 tsp ground cumin
1/2 tsp sweet paprika
1/4 tsp hot ground red pepper (optional)
1/2 cup plain yogurt (can be low or full fat)
1. Mash the garlic with the salt. In a blender or food processor, combine the garlic mixture, salt, lemon juice, and tahini and a few tablespoons of water. Pulse briefly until the mixture becomes homogenous, fairly thick and white. If necessary, add more water and pulse again. Add the chickpeas and pulse until smooth. Add the spices and yogurt and pulse again. Taste and adjust seasonings, if desired.
2. Serve the sauce and salad separately. Allow diners to drizzle their greens with the sauce, as desired.
Crispy Filled Potato Cakes
Makes two 6-inch cakes; serves 4 as a main course or 12 as appetizers
These are delicious as a main course with a salad on the side. Smaller wedges are portable enough to serve as hors d’oeuvre. I’ve come up with two different fillings—a bacon-onion-red pepper version as well as a vegetarian cabbage-apple filling—but this dish would lend itself to all sorts of variations, especially if you happen to have some leftovers you need to use up.
Potato Dough
2 cups mashed potatoes
1 egg
1½ cups unbleached white flour
1 tsp salt
¼ tsp nutmeg (freshly grated if possible)
½ tsp black pepper
1 cup grated Swiss cheese
1. Combine all the ingredients, except the cheese, until you have a smooth dough; a food processor works well for this. Stir in the cheese. The dough will be quite sticky and is easier to work with lightly wet hands.
2. Put a heavy skillet or griddle on to heat. Well-seasoned cast iron may not need any additional oil or butter.
3. Meanwhile, divide the dough into quarters. Working on lightly floured parchment or wax paper, pat 2 of the quarters into rounds approximately 6 inches in diameter. Top one of the rounds with half of the filling mixture. Carefully flip the other round onto the filled round and gently seal the edges of the rounds.
4. If needed, put a teaspoon or two of butter or oil into the hot skillet and spread it evenly over the pan. Now, using the parchment paper to lift, carefully flip the potato cake into the pan. While the first cake is cooking, proceed as above to assemble the other potato cake.
5. Cook the cake for 5 or more minutes on each side, until it is golden brown on both sides and the dough has puffed slightly and no longer looks raw (it will remain very moist). Serve immediately or hold in a warm oven until the other cake is finished cooking.
Bacon-Onion-Red Pepper Filling
Makes enough to fill two cakes
½ lb bacon (preferably thickly sliced), chopped into ¼-inch pieces
1 medium onion, finely chopped (about 1 cup)
½ cup seeded and chopped red peppers (previously roasted and frozen peppers work well, as do canned pimentos)
½ tsp minced fresh rosemary (or you can use whatever herbs you like)
Freshly ground black pepper to taste
1. Sauté the bacon in a heavy skillet. When it gives up some of its fat, add the onion and red pepper, rosemary, and black pepper. Cook until the bacon is browned and the onions are soft and lightly caramelized. Lift from the pan using a slotted spoon so the fat remains behind; set aside to cool a bit. You may use a small amount of the bacon fat for cooking the potato cakes, if you like.
Cabbage-Apple Filling
Makes enough to fill two cakes
1 Tbsp butter
2 cups chopped cabbage (red, green, or savoy)
1 cup chopped apple (about one large apple; use something that will remain firm when cooked, like Granny Smith or Braeburn)
1 small onion, chopped (about ½ cup)
1 Tbsp minced fresh dill (optional, but it’s really good)
2 Tbsp cider vinegar
1 Tbsp heavy cream (optional)
Salt and pepper to taste
1 cup grated Swiss cheese, or other similar cheese (optional)
Heat a heavy skillet. When it’s hot, melt the butter in it and then add the cabbage, apple, and onion. Sauté until the vegetables are translucent and beginning to get a little golden. Add the dill and the cider vinegar. If you like, add the heavy cream. Cook a minute or two then add salt and pepper to taste. Set aside to cool. If desired, you may sprinkle additional cheese over the filling, ½ cup per cake, before putting the second dough disk on top of it and sealing.
Maple Butter Root Cake
12 Tbsp (1½ sticks) unsalted butter, plus a little more to butter the pan
½ vanilla bean or 1 tsp vanilla
4 whole green cardamom pods or 1 tsp ground cardamom (optional)
4 eggs at room temperature
1 cup (real!) maple syrup (grade B is best for baking)
¾ lb fresh parsnips, beets, or carrots
1½ tsp baking powder
½ tsp salt
2½ cups flour
For serving: 1 pint of heavy cream sweetened with maple syrup and whipped to soft peaks (optional)
1. Butter a 10-inch round pan (spring-form if you have one) or a deep (at least 3 inches) 9-inch pan. Line the bottom with parchment paper, butter the paper, and then flour the pan. If you don’t have parchment, just butter and flour the pan. Preheat the oven to 350º.
2. Put the butter into a heavy pot or sauté pan. Cut the vanilla bean down the middle the long way and scrape out the seeds with the edge of paring knife into the butter. Throw the pod in, too. Crush the cardamom seeds with the side of a chef’s knife and add those to the butter (if using the liquid vanilla and cardamom, proceed to the next step). Melt the butter over medium-low heat and let it sizzle slowly, stirring occasionally to break up the vanilla seeds, until the butter smells nutty and is golden brown. Don’t burn it! Remove from heat and set aside to cool. If the butter is on the verge of being too brown, pour it into a bowl to cool.
3. Meanwhile, crack the eggs into the bowl of an electric mixer (you can also use a hand-held mixer, or if you’re up to it, a whisk). Beat at medium-high speed until the eggs begin to fluff up a bit and get pale. Pour in half of the syrup and continue beating until the eggs rise a bit and get thicker.
3. Meanwhile, peel whichever root vegetable you are using and cut into chunks. Put them in the bowl of a food processor along with the rest of the syrup and process until well pureed. If you don’t have a food processor, grate them on the fine side of a grater and stir in the syrup.
4. Put the flour, salt, and baking powder into a bowl and whisk until well combined.
5. Strain the vanilla bean and cardamom pods out of the butter. Save the pods for another use (you can rinse and dry them and then add them to a bowl of sugar to add a nice flavor to the sugar). Gently fold the butter (and vanilla and ground cardamom, if using) into the eggs, then fold the parsnips into the eggs by hand with a whisk—the idea is to keep the eggs as light as possible.
6. Now sprinkle 1/3 of the flour mixture over the eggs and fold this in, again trying not to deflate them. Sprinkle in the remaining flour in two more batches, carefully folding it into the batter. Mix only until you can’t see any flour; try not to overmix.
7. Pour the batter into the pan and bake for about 40 to 45 minutes until a toothpick inserted into the center comes out clean. Cool for 10 minutes or so, then turn out of the pan and let the cake cool on a wire rack. Serve warm or at room temperature with whipped cream sweetened with maple syrup and fruit if desired.


 View Print Edition